Need help with your exported tracks? Exporting your raw tracks from iOS GarageBand isn’t too difficult. Getting those raw tracks to sound like a finished record can be a bigger challenge. I’d be glad to help. Tell me about your music!

Updated for iOS14, January 2021WATCH THE YOUTUBE VIDEO! Includes bonus content that includes saving MIDI tracks (virtual instruments) as audio files for export too.
GarageBand is Apple's free music-making app for their computers, tablets, and phones. Working from almost anywhere, singer-songwriters can use the built-in mic on their iOS device to first capture a guitar or piano part and then record their vocal on another track. Recording each part to a separate track provides greater flexibility as you further develop the song and have it mixed & mastered before releasing it to your audience.
While many people already know how to save their finished song as a single stereo file to iTunes, fewer may be familiar with the process of properly exporting multi-track files from iOS GarageBand to collaborate with other musicians, producers, and mix engineers. You can't assume that everyone you work with (now and in the future) will always have the same gear or operating system, so it's important to provide audio files of decent quality that can be accommodated by most systems now and in the next few years.
Regardless of how many tracks you record, there are basic requirements to consider. For a typical project, remember these three things when recording:
Record your tracks dry. Do not apply reverb or delay/echo when recording, as the effects will be printed to the resulting audio signal and cannot be removed later. I know it sounds cool right now but these effects should be added during the mixing stage instead where they can be made to sound even cooler.
Avoid clipping. GarageBand displays a meter to monitor your input level when you use the Audio Recorder.
Use a tuner before every take to make sure your instrument stays in tune.
When it's time to export your recorded audio files, we need to ensure two more important items are being addressed:
Make sure each multi-track file is exported from the start of your song on Bar 1, Beat 1.
Export each track using the same sample rate and bit-depth.
Both items can be addressed by following these steps to export individual multi-track files from GarageBand on iOS 11.
(keep scrolling for the detailed instructions)
Download the FREE GUIDE in PDF format and keep it handy to export your multi-tracks from iOS GarageBand consistently.
If you find this information helpful, please share it via social media and within your music-making circles. Have more questions? Tell me about your music!
EXPORT MULTI-TRACK FILES FROM iOS GARAGEBAND
Male a copy or duplicate of your song as a backup.
Tap your first track to select it.
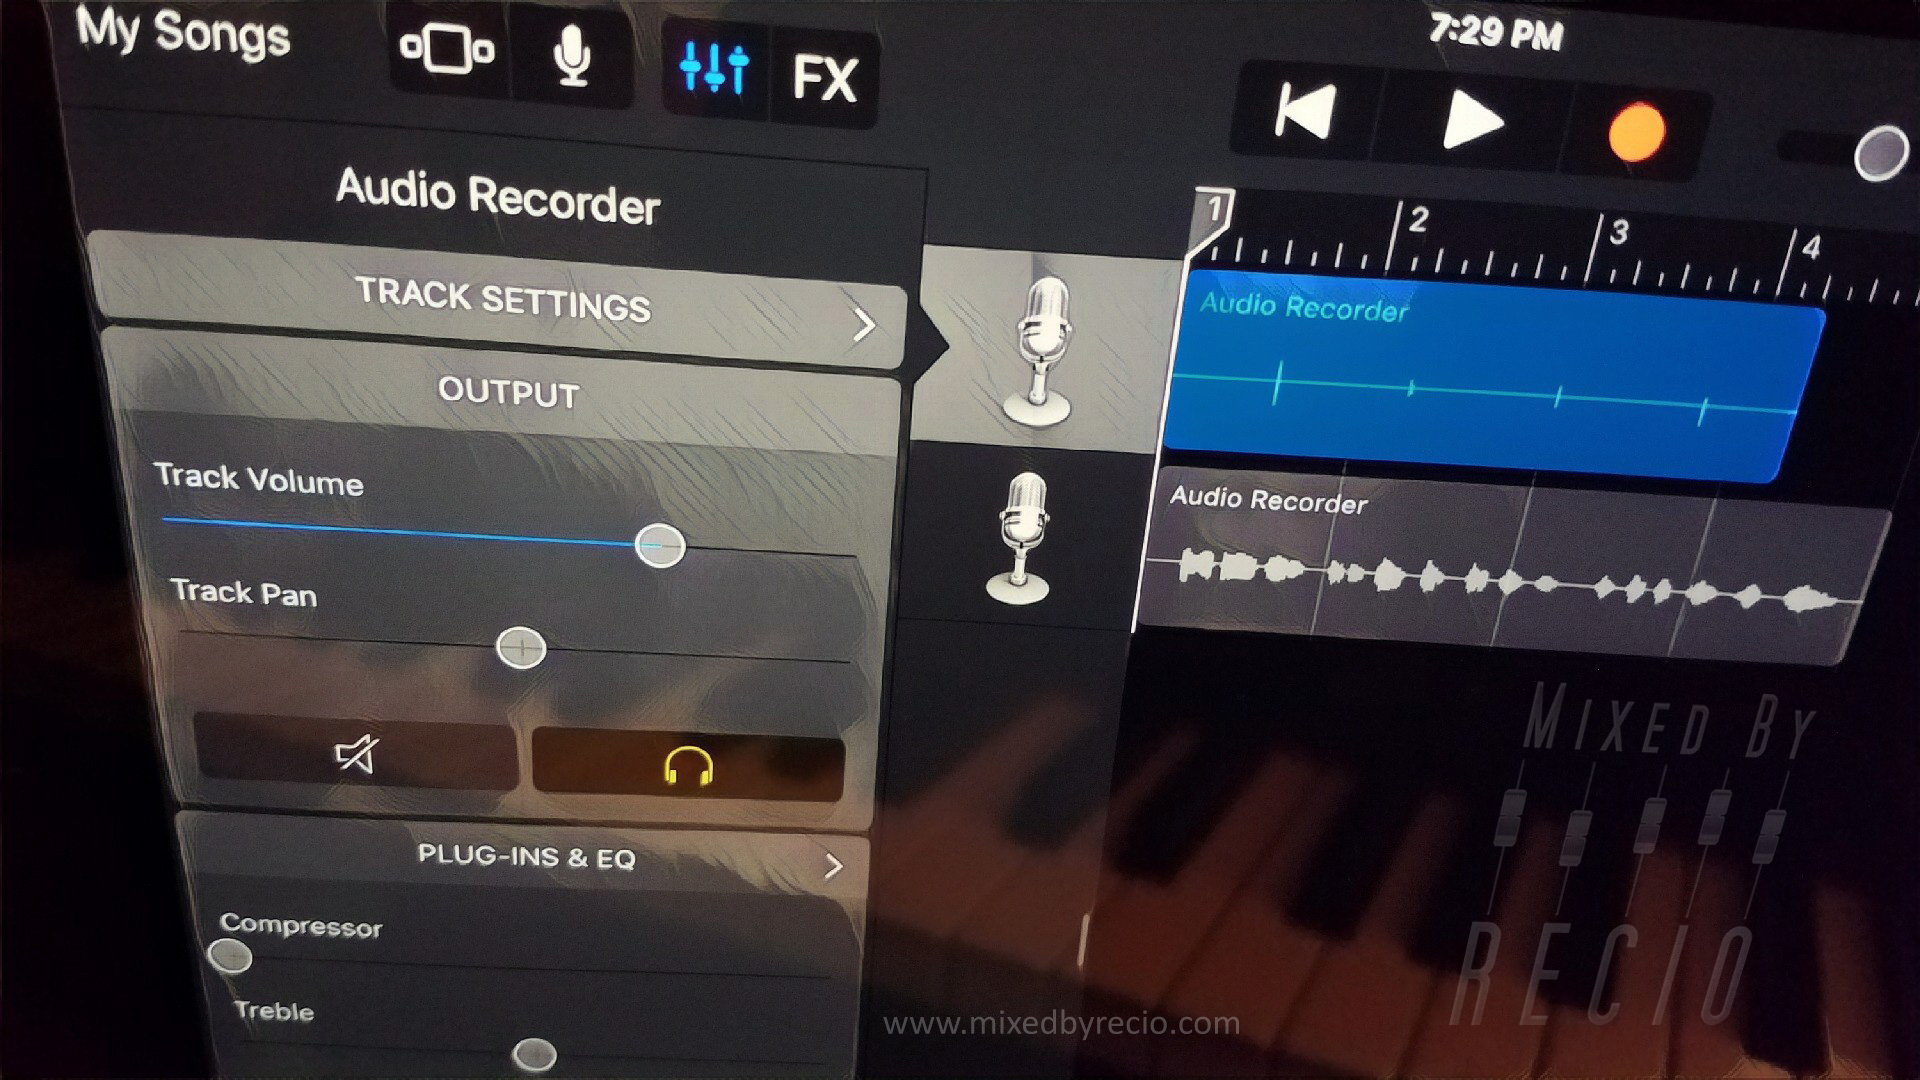
Tap the Faders icon to view the mixer controls.
Solo the track by tapping the headphones icon. This should mute all other tracks except this one.
Disable any effects by sliding the Echo and Reverb sliders to the left. The EQ (Treble, Bass) and Compressor settings should be left alone, except when necessary, as the results will be printed as part of the exported audio and cannot be removed later.
Tap the Document icon (top left) to save your project and view your songs.
GarageBand uses the song's title as the file name when exporting. With multiple tracks to export, temporarily rename the song to include the name of the part you're exporting (e.g., MySong-Guitar, MySong-Vocals). This will make it easier for everyone to identify the different files later.
Press & hold the project name to display the command buttons.
Select the Share command.
Select Song to only export a single audio file and not the entire project.
For the audio quality, select Uncompressed (WAV) 44.1 kHz/24-bit or Uncompressed (AIFF) 44.1 kHz/24-bit. Note: 24-bit audio resolution can be enabled under the Settings menu. If 24-bit audio is unavailable on your device, 16-bit audio will be used instead. This setting should be made before you record your audio. If the audio was already recorded at 16-bit resolution, there’s no reason to change it to a higher resolution now.
Tap Share.
Tap Open in…
After GarageBand prepares the file for export, tap Save to Files.
Select iCloud Drive as the location.
Tap Add. Your audio file is now saved in high-quality WAV or AIFF format, dry with no effects.
Repeat the process for each additional track you need to export, remembering to only solo one track at a time, removing any effects, and temporarily renaming the song’s title each time to reflect that part.
When finished, your iCloud account will include multiple files (one for each exported track) that you can now share with your collaborators. These files can be imported into a standard Digital Audio Workstation (DAW) such as Pro Tools, Logic, Reaper, etc., where they should all start on Bar 1, Beat 1, and share the same sample rate and bit-depth.
For 2 or 3 tracks, this process (while tedious) will work well and ensures fewer headaches further down the road. There are other tutorials and resources available online for exporting files from GarageBand on your Mac; I wanted to address iOS.
Are you or another music friend an Android user? I recommend the mobile app from BandLab and I’ve created a separate video demonstrating how to achieve similar results:
What other questions or concerns do you have about getting your song mixed? I'd love to hear about your music!
PLEASE SUBSCRIBE
we respect your privacy


This video shows how to export individual multitrack files from iOS GarageBand and includes steps for converting MIDI tracks to audio.